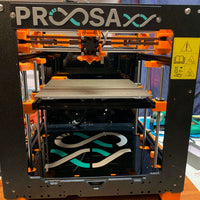
ProosaXY (Prusa Mk3 CoreXY Conversion Kit) *Open Beta*
$259.99


ProosaXY (Prusa Mk3 CoreXY Conversion Kit) *Open Beta*
$259.99
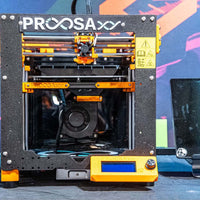
ProosaXY (Prusa Mk3 CoreXY Conversion Kit)
ProosaXY is a Prusa MK3/S CoreXY conversion kit that aims to get more performance out of your 6 years old machine with the lowest cost possible by re-using most of the stock MK3/S parts.
Make sure you read the open beta kit notes.
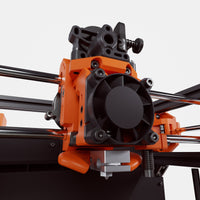
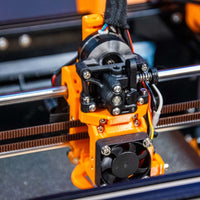
Specs
- Better performance (check input-shaper in pictures).
-
Triple Z (independent or sync based on controller board)
- Single v6 hot end (default) or mixed 2-in-1-out hot end (WIP).
- Optional AUX cooling fan.
- Semi-enclosed (default) or fully-enclosed with top hat (coming soon).
- Our industrial leading SnakeOil technology 😉
Notes
- This mod requires some drilling on the original center frame plate and cutting the original motor leadscrews. This drilling/cutting is easy enough to be done with a hand drill and a hacksaw BUT THERE IS NO WAY BACK. You won't be able to convert back to the original MK3/s machine if you change your mind later.
-
To keep the cost down and reuse old components, there are some trade-offs I made:
- The machine is semi-enclosed by default and will need some printed panels and a top hats to fully enclose it.
- To match the frame height, cutting the motor leadscrew and linear shafts is required.
What's in the Kit
- All new extrusions (drilled and tapped)
- Fastener/Screw/Washer kit with 20% extras *except for a few sizes mentioned in notes below
-
2x HoneyBadger Nema 17 48mm motors
- 1x 3rd Z motor w/ integrated lead screw
- 1x Sherpa mini extruder
- 4m Original Gates 2GT 6mm belt
- 1x GDSTIME 120120x32mm 12v blower fan (aux fan)
- 4x Rubber feet
- 36x F623RS bearing
- 4x 2GT 16T idler 3mm bore
- 2x 370mm linear shaft (d=8)
- 2x 330mm linear shaft (d=8)
- 3x 260mm linear shaft (d=8)
- 6x linear bearings
- 1x Rubber tape (60x18x0.5mm)
- 14x 2020 corner bracket
- 4x 1515 corner bracket
-
2x Din rail 329mm
- 1x Din rail 430mm
- 3x POM T8 nut
Open Beta Kit Specific Notes
We're offering beta kits at a discounted price for customers who are willing to address the notes below during their build. These issues will be fixed in the production version of the kit.
Beta Kit - Things to FIX
- Frame extrusions:
- We found some extrusions in beta kits that were not cut 100% square, but are still usable. Use the included corner brackets to ensure everything lines up.
- Check for "fence burs" in the tapped ends and sand/file as necessary.
-
Extra wrench hole in two extrusions for easier motor mount access (optional).
-
Motors:
- Motor shafts are a little short (23mm instead of 25mm) and only make minimal contact with the support bearings.
- Also, the support bearings may be too tight to fit properly on the motor shaft. Some sanding/filing may be necessary, or simply install without the support bearings.
-
Cut rubber tape into two strips of 5x48mm
-
DIN rails may be a tight fit. Shorten by ~1mm (if necessary)
-
Aux fan is 12v (instead of 24v) so be sure to use a buck converter or an MCU with selectable voltage
Beta Kit - Things to ADD
- +12 m3 square nuts
-
+12 m3x25mm button head screws
-
+2 m3x30mm socket head screws
-
24v hotend fan and part cooling fans **be sure to use a buck converter or an MCU with selectable voltage if you're re-using your existing 5v fans
-
Drill bits and m3 tap for drilling front center frame plate (optional)
-
2.6mm drill bit
- 5mm drill bit
- m3 tap
We also recommend upgrading your MCU and hotend to take full advantage of the increased speed.
Links
Backed by our 45-day no questions asked return policy.